AN02 - Body Mechanics - Assignment 04 - Physicality with Weight
The FINAL assignment for Body Mechanics is all about communicating “Weight”… It is critical to understanding the forces applied to a character…
Character movement can be broken into TWO big categories…
External forces - The movement of the physical parts of the characters body and how they translate or rotate to achieve movement.
Internal forces - This is WHY the character is moving.
Although internal forces are the most important for overall communication, weight is the most important force for making animation “believable”.
When a character picks up a rock, is that person strong or weak? Is the rock bigger than they are? If it is, then when they pick it up, either they’re a superhero with superhuman strength, ORRRRRRRR the rock is fake and the animation isn’t believable.
Physicality with Weight
The goal as described in the syllabus is kinda generic…
The priority for this assignment is to show a strong understanding of the core ideas around body mechanics, as well as solid blocking.
Choose a specific action to animate.
Pushing/pulling a heavy object
Lifting a heavy object and setting it down
etc.
But the best way to start ANY project is with “Why” so the planning process begins with a narrative…
Step 01 - Planning
Why is the character doing anything at all?
A good narrative sets up a scene so that you can see the action in your head. This makes everything that comes after the narrative sooooooo much easier and I’m able to quickly shoot a reference…
After Effects, allows me to identify the key poses that communicate the action and that stepped version is what you see in the main view. These still frames are what will guide my work in Maya so the next step is to analyze how the body is moving from pose to pose.
To do that, I pull the still frames into Procreate on the iPad and draw on top of them and make notes as I go…
Step 02 - Blocking
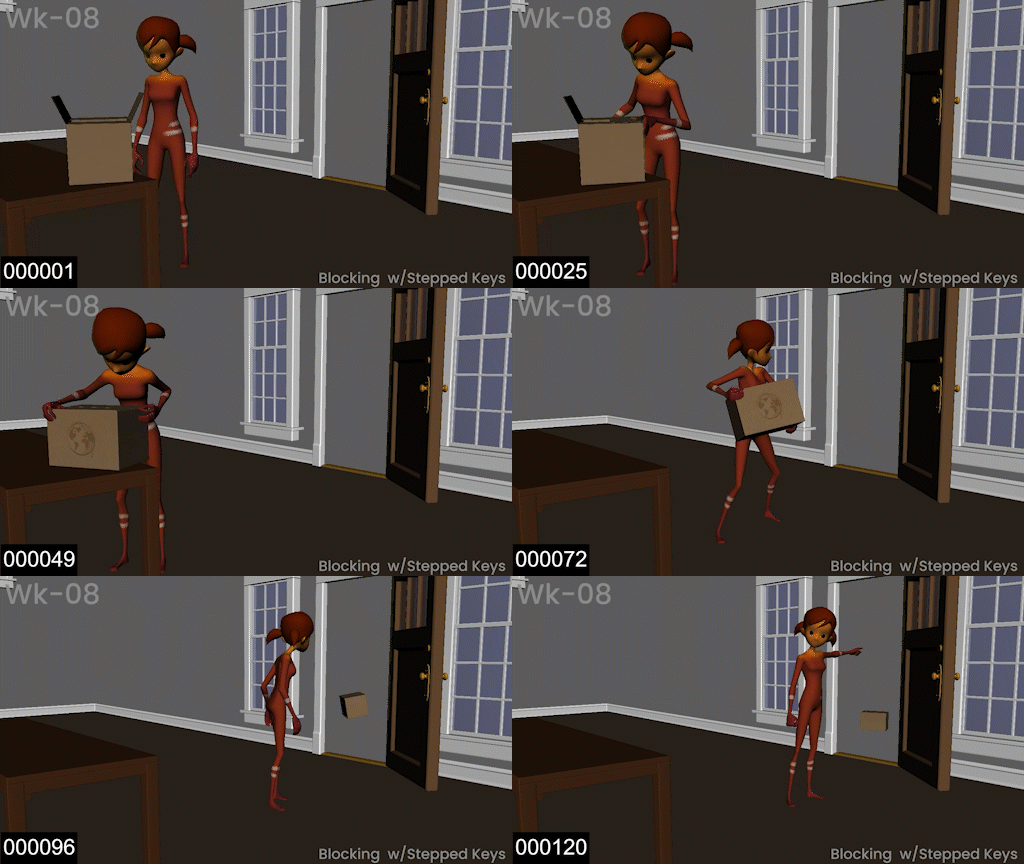
All that planning effort makes the blocking process go much faster, and I’m able to get the blocking done for this shot in about 1 day…
It’s still missing Stewart on the right hand side of the frame, but it is definitely clear what is going on, so for the next week I incorporated critcal feedback from the Mentor, Dana Boadway Mason and added more emphasis on the weight of the box.
Step 03 - Splining
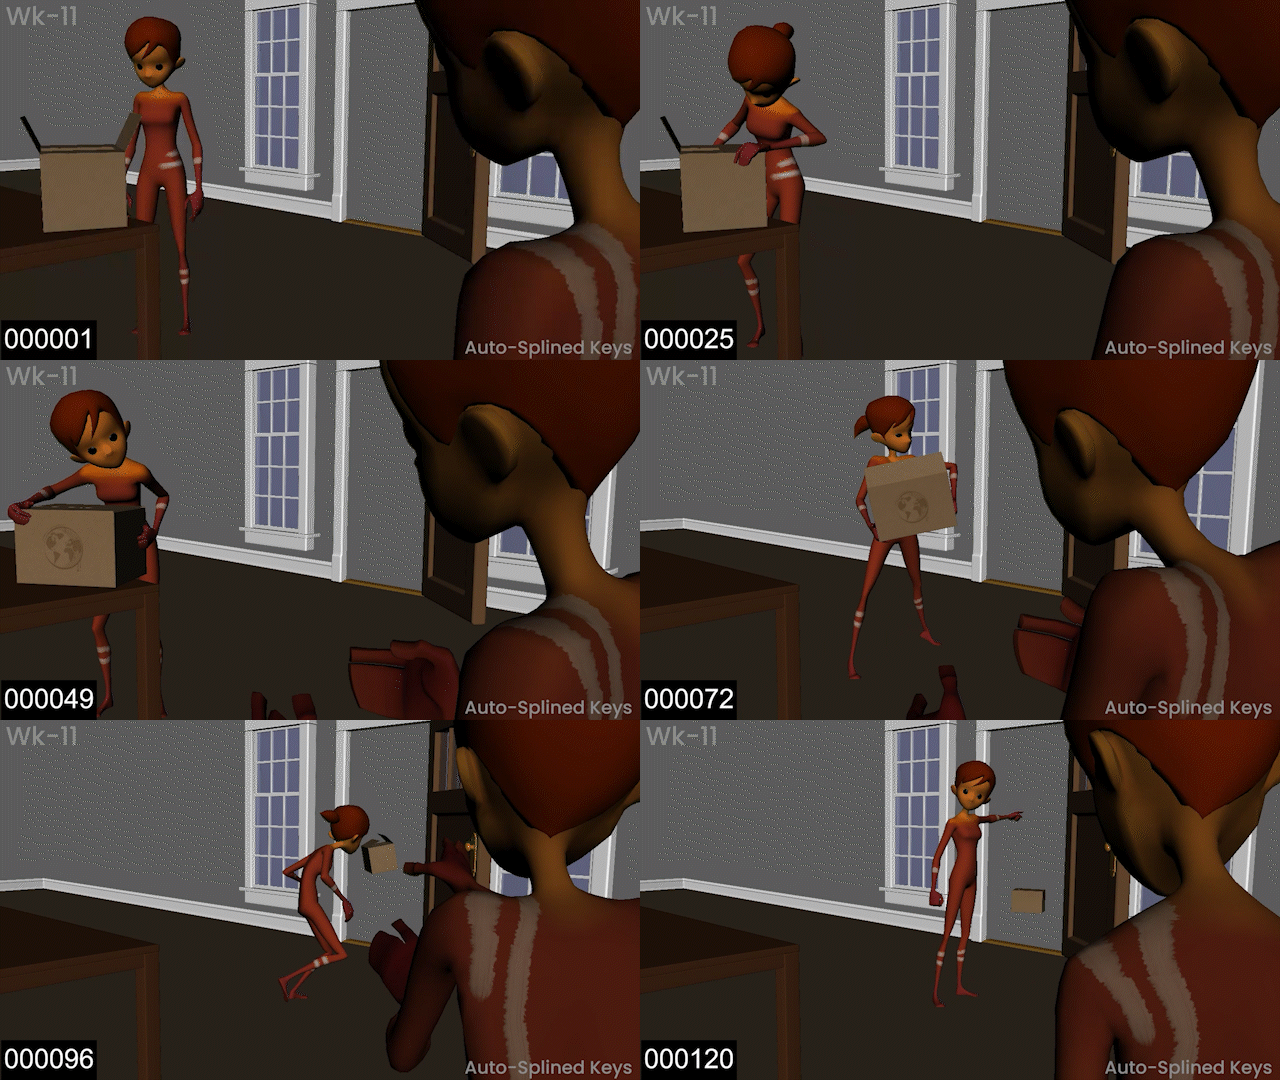
The splining process is where things get actually difficult. The blocking process is very straight forward. The poses come together quickly but as soon as you start to smooth the animation, the actual problems start to arise.
The 3D app (Maya in this case) takes a best guess on how things should move and you’re left with animation that is not very good looking.
The joints are floating and bouncing in unnatural ways and you have to go through the entire set of controls with a fine tooth comb. Also, Stewart is very distracting and the next part of the process is to get things looking “good” by cleaning up Stella’s arcs and minimizing Stewart to get to this result…
Here’s the progress all lined up…
And just like that, my second class is OVER… I learned soooo much and I’m excited to move on to Advanced Body Mechanics next term!


